Obs Failed to Connect to Any Servers Please Check Your Internet Connection and Try Again
OBS may fail to connect to the server if its installation is outdated. Moreover, the wrong configuration of the Bind IP or MTU may also cause the event at mitt. The user encounters the event when he tries to stream (regardless of the streaming service) through the OBS application merely encounters the following blazon of message:
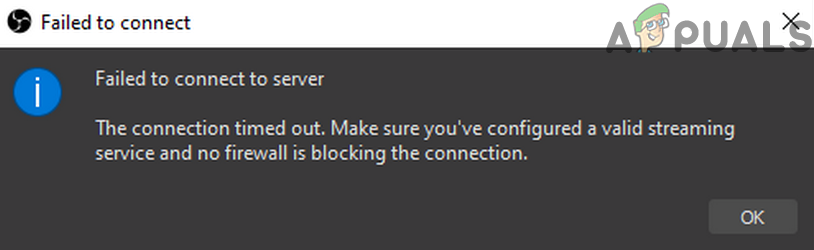
Failed to connect to server. The connection time out. Make sure y'all've configured a valid streaming service and no firewall is blocking the connection.
Before moving on to the solutions to fix OBS failed to connect to the server, bank check if you tin can stream in OBS on a unlike network or a different device on the same network. Also, cheque if the streaming service servers are up and running. Moreover, brand sure to enable Wi-Fi (even if yous are using an Ethernet cablevision). Additionally, check if the Ethernet cablevision is plugged into a regular Ethernet port, non a 10GE port. Furthermore, check if rebooting your PC and networking equipment solves the problem. Last but not least, if you are hosting a Vodcast, then brand sure to end information technology and then try to stream using OBS.
Solution ane: Create and Re-enter the Stream Cardinal
A temporary glitch between the OBS awarding and streaming service may crusade the server upshot and may become cleared after re-inbound the Streaming primal after resetting primal. For illustration, we will talk over the process for Facebook Live, you may follow the instructions as per your streaming service.
- Launch the Facebook in a web browser and click on the Live Video (in the new post section).
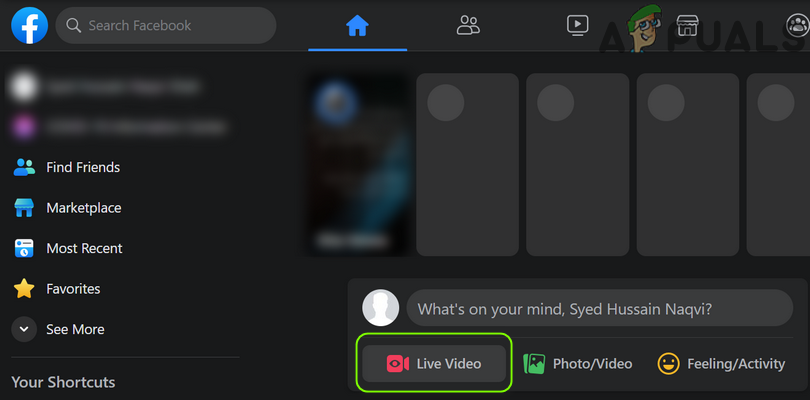
Open Alive Video on Facebook - And then select Utilise Stream Central and curlicue downward till the stop.
- At present click on Reset (in front of the Stream Key) and so copy the Stream central.
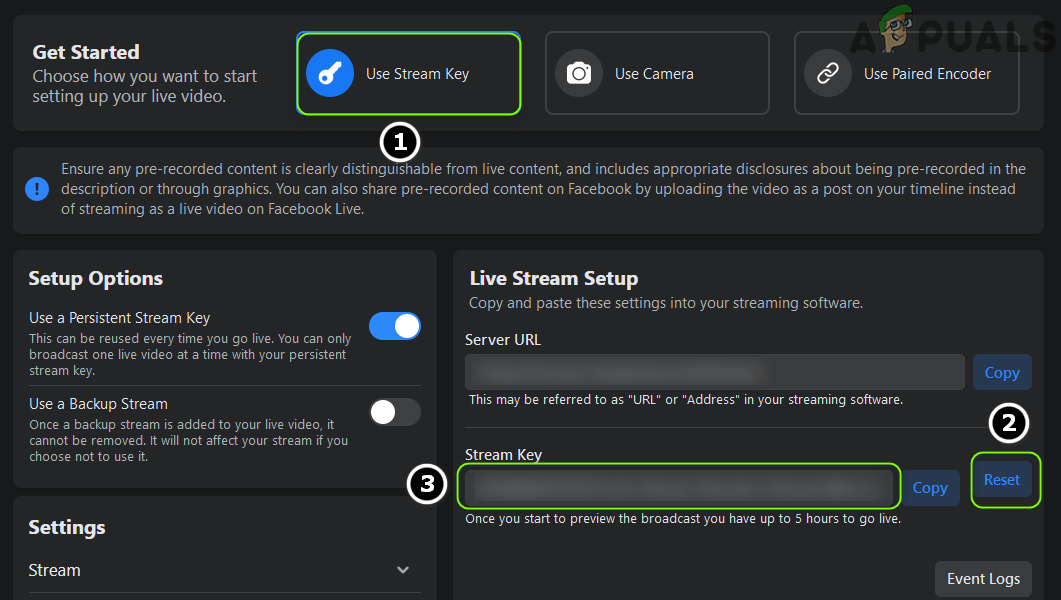
Create a New Stream Cardinal in Facebook - Then launch OBS and click on Settings (nigh the lesser of the screen).
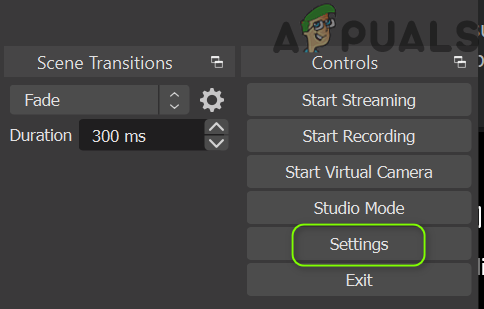
Open up the OBS Settings - Now select Stream and paste the copied key in the Stream Key box.
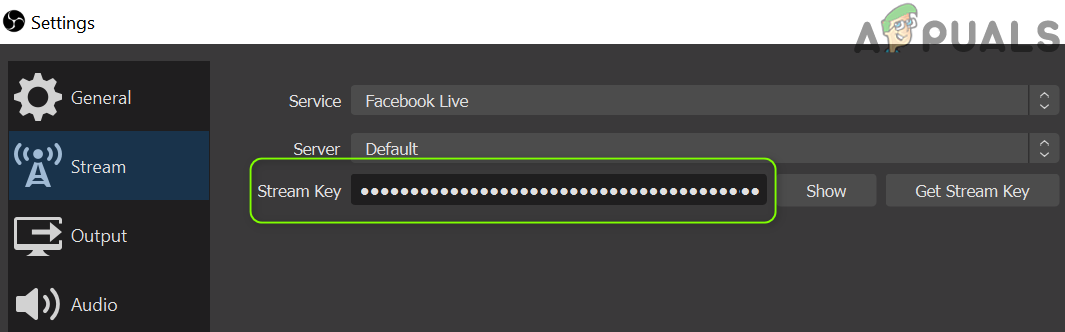
Paste the Stream Cardinal in the OBS Settings - Then apply your changes and bank check if the OBS is streaming without any effect.
If the event persists, check if using a different business relationship (e.g., a different Twitch account, if the issue is occurring with Twitch) resolves the OBS issue.
Solution 2: Enable Dynamic Bitrate in OBS
You may encounter the issue at hand if the frames are dropping during the streaming procedure. In this example, enabling the Dynamic Bitrate may solve the trouble (this option is only available on OBS version 24 and above).
- Launch OBS and open its Settings.
- At present, in the left pane, select Advanced, and in the correct pane, gyre down till the cease.
- Then, in the Network section, checkmark the option of Dynamically Change Bitrate to Manage Congestion (just under Bind to IP).
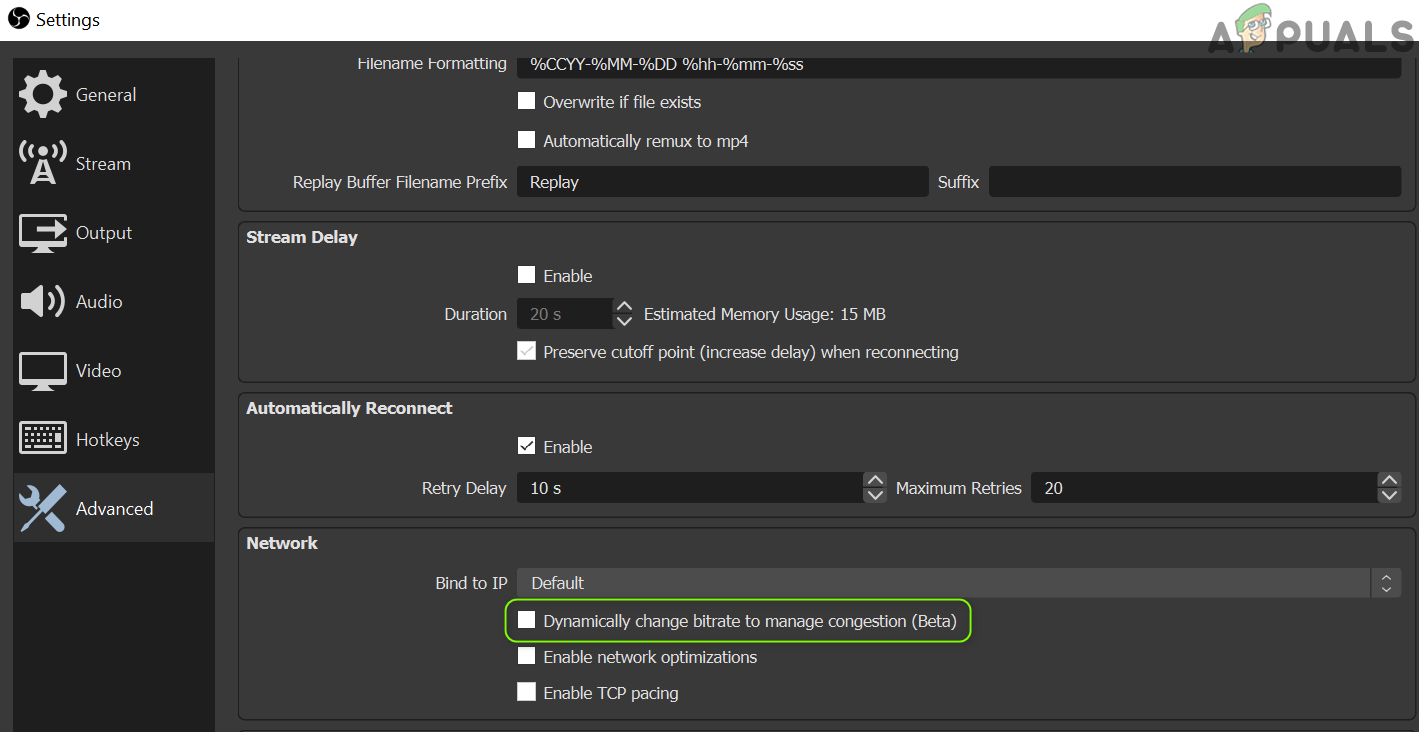
Enable Dynamically Modify Bitrate to Manage Congestion - Now utilise your changes and relaunch OBS to check if it is working fine.
Solution 3: Update the OBS and Os of Your System to the Latest Build
The OBS awarding may evidence the failed to connect to server message if the OBS awarding or the Bone of your organisation is outdated as it can create incompatibility betwixt the both (every bit well as with the servers yous want to stream). In this scenario, updating the OBS and Os of your arrangement to the latest build may solve the trouble.
Update the OBS Application
- Launch the OBS application and open its Help menu.
- At present select Bank check for Updates and if an update is available, apply the update.
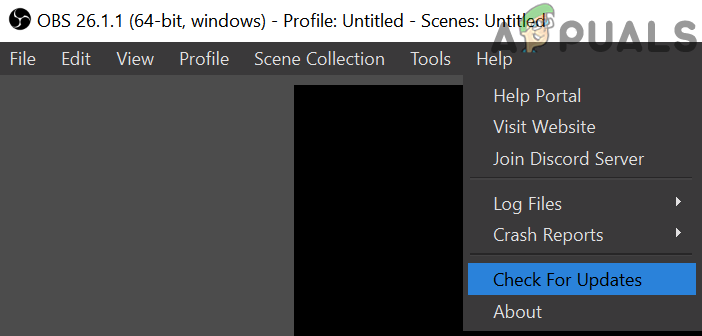
Check for Updates of OBS - So reboot your PC and check if the OBS is working fine.
If you are using an obsolete version, then download/install (without uninstalling the previous version) the latest version of the OBS application and check if that resolves the OBS outcome. If you lot are using a Linux distro that is based on PPA (like Ubuntu), then you may execute the following in the Beat out to cheque if that resolves the OBS issue:
sudo apt install ffmpeg sudo add together-apt-repository ppa:obsproject/obs-studio sudo apt update sudo apt install obs-studio
Update the OS of your Arrangement
For analogy, nosotros will discuss the process for a Mac organization, you may follow the instructions every bit per the OS of your organisation to update.
- Launch the Apple tree Preferences and open up Software Update.
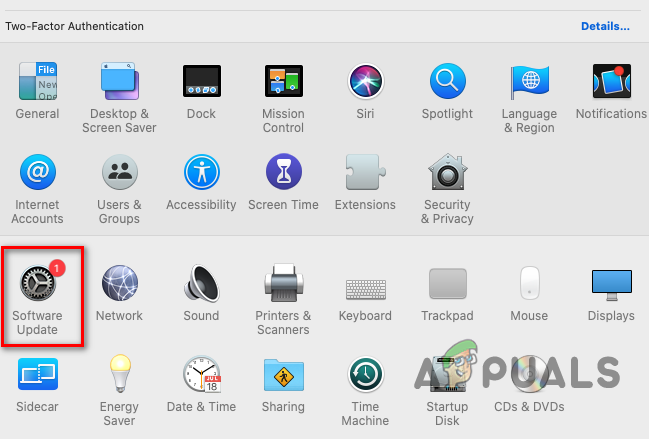
Open Software Update in the Mac's Preferences - Now, check if an update of the Bone is available, if so, utilize the update and reboot the device to check if the OBS application is clear of the failed to connect to server effect.
Solution 4: Change the Streaming Server
The OBS application may fail to connect to a server if the server itself is downwardly. In this instance, changing the streaming server to a different location may solve the problem. For illustration, we will talk over the process for the Twitch service. Only before proceeding, it will be a good idea to apply a port scanner to bank check if the server port is open. If and then, brand sure an application is listening to the open port.
- Launch the OBS application and click on Settings.
- Now steer to the Stream tab and expand the dropdown of the Server (for some distant servers, you may have to lower the bitrate).
- Then select a different server and employ your changes.
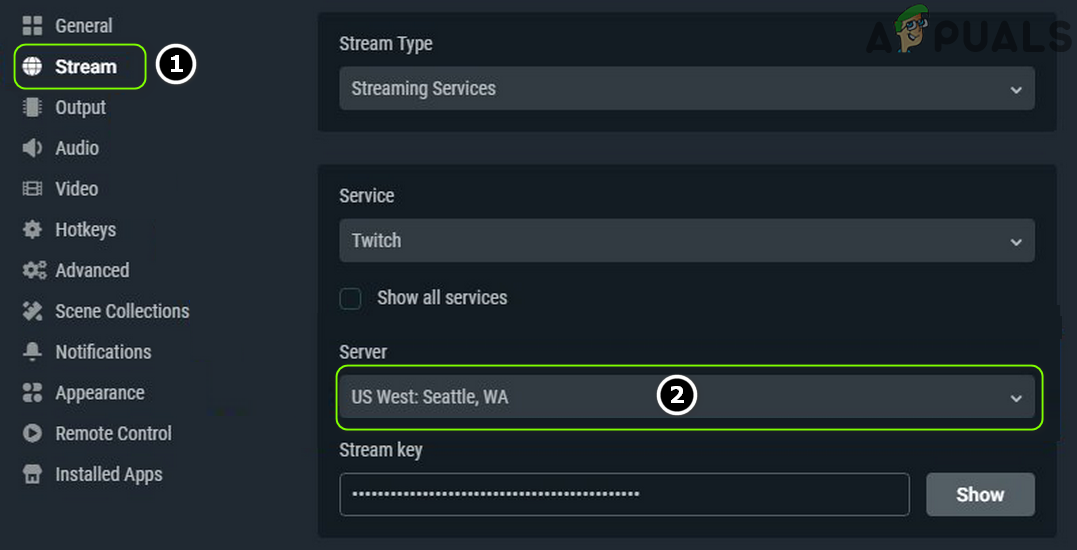
Modify Streaming Server in OBS - Now relaunch the awarding and check if the OBS is clear of the server issue. If the issue persists, then you may try all the servers one past one in the OBS to sort out the issue.
If you are having trouble finding the server, then you may use the Twitch Test utility (or Ping the server) to find out the best server for you lot. For some services, you can try likewise try the auto-configure option to solve the OBS issue.
Solution v: Edit the Bind IP Option in the Avant-garde Network Settings
The OBS awarding may neglect to connect to a server if the Bind IP option in the Advanced Network settings is not properly configured. In this context, properly configuring Bind IP may solve the problem.
- Launch the OBS awarding and open up its Settings.
- At present, in the left pane, steer to the Advanced tab, and in the right pane, curlicue till the end of the screen.
- Then, in the Network section, expand the dropdown of the Bind to IP and select Default.
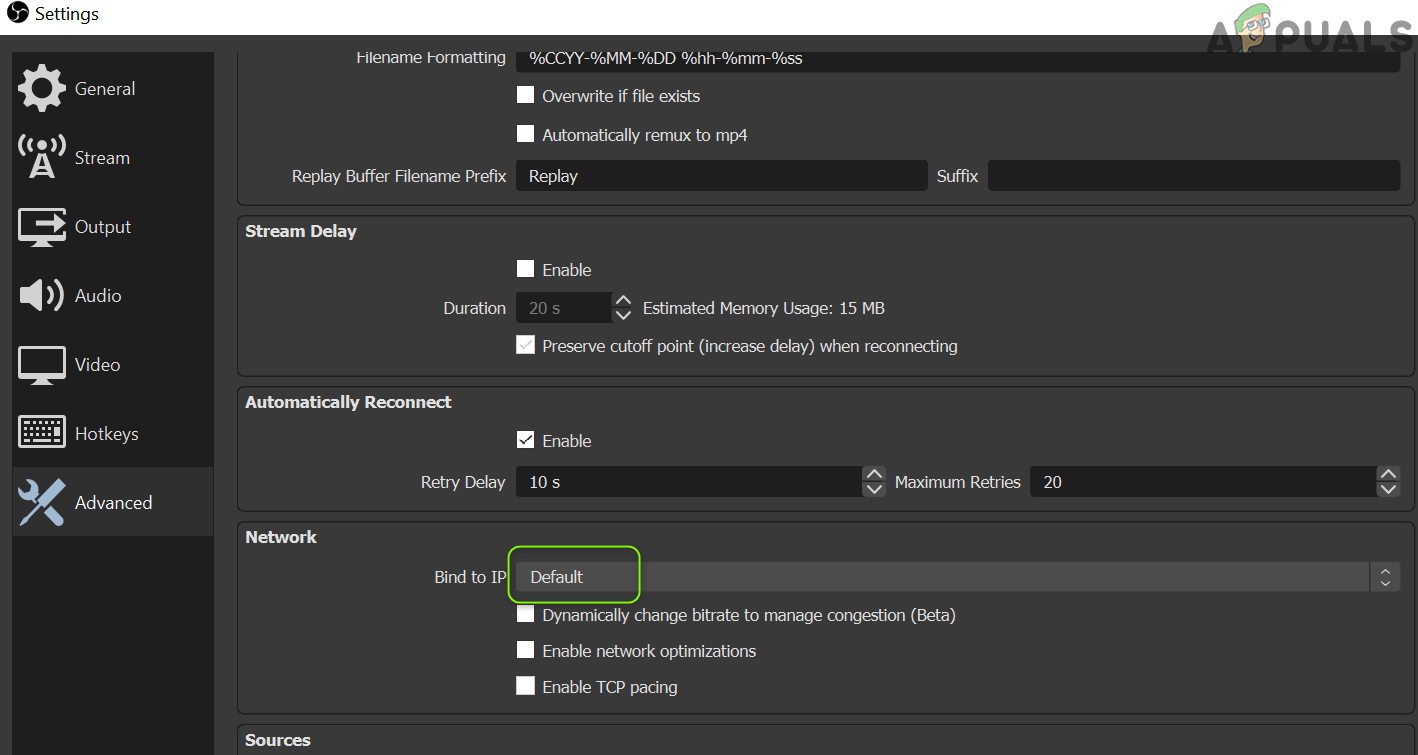
Set Bind to IP to Default in OBS - If it is already fix to Default, then select the network connection name with the IP address (preferably IPv4 address) of your organisation. If the Demark to IP choice is greyed out, brand sure to disable all OBS outputs like NDI, virtual camera, etc., and try again).
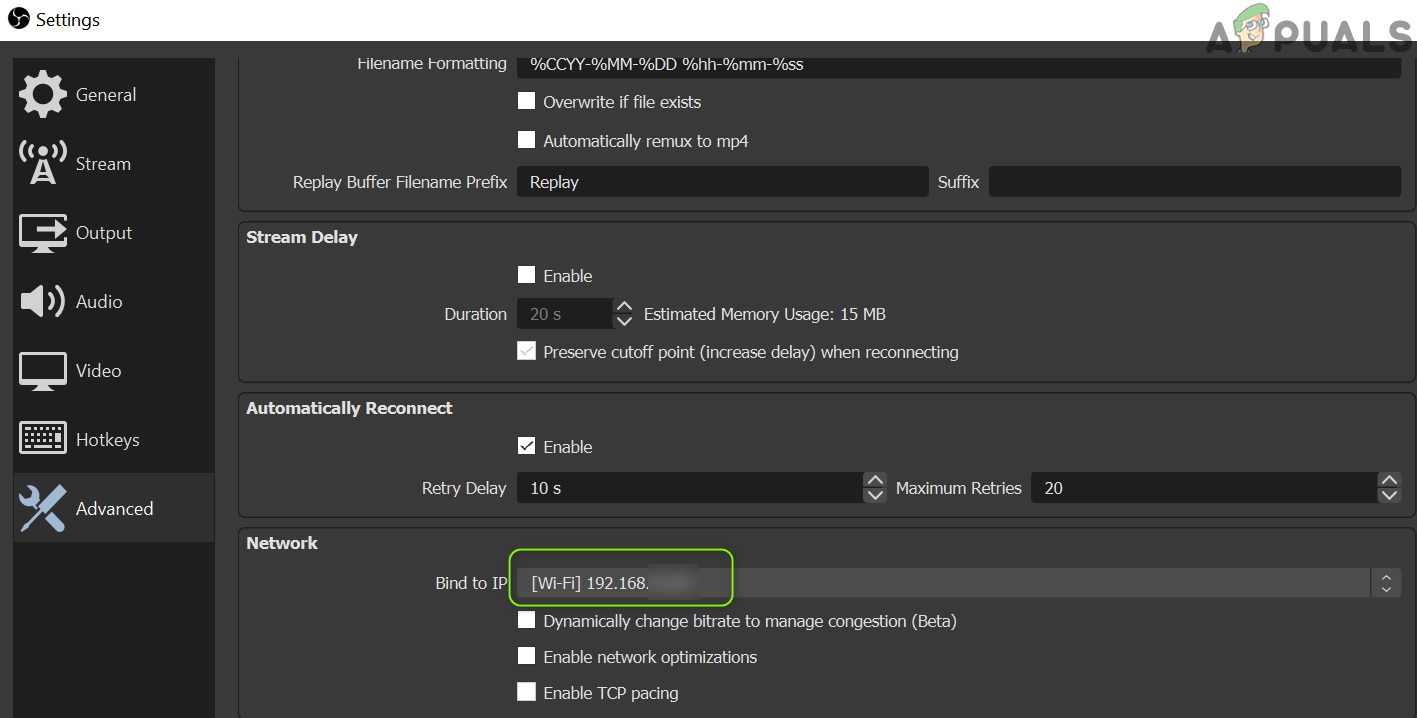
Gear up Bind to IP to Your IPv4 in OBS - Now apply your changes and check if the OBS can connect to the server.
Solution 6: Allow the OBS Through the Firewall of Your Organization
You may fail to stream through the OBS if your system's Firewall is blocking access to a resource vital for the performance of the OBS awarding. In this context, allowing the OBS through the Firewall settings of your arrangement may solve the problem. For elucidation, we will hash out the process for Windows Defender Firewall.
- Click Windows, type: Firewall, and open Windows Defender Firewall with Advanced Security.
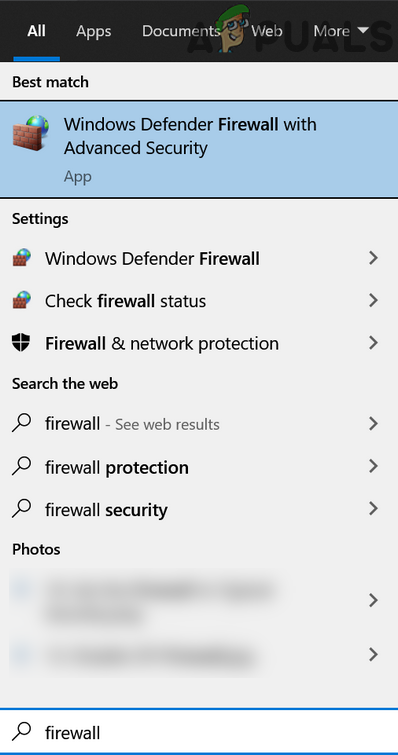
Open Windows Defender Firewall - Now, in the Outbound Rules and Inbound Rules tab, brand sure no rule is blocking OBS (e.yard., select Inbound Rules and press the O cardinal to check for OBS entry).
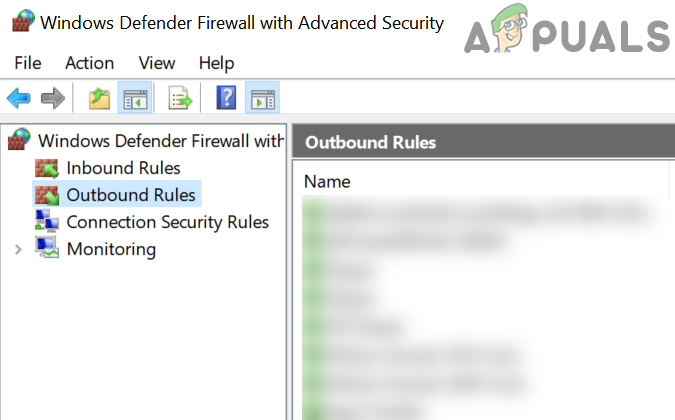
Bank check Firewall for Rules Blocking OBS and Select Outbound Rules - Then, in the left pane, select Outbound Rules and aggrandize the Activeness carte.
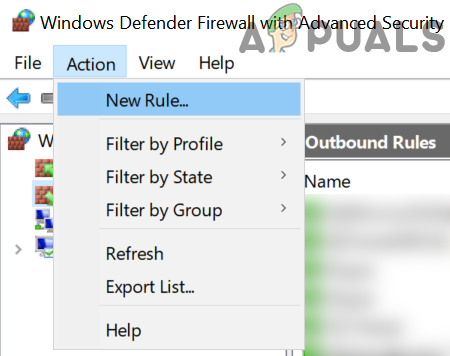
Create a New Rule in Firewall - At present open New Dominion and select the radio button of Program.
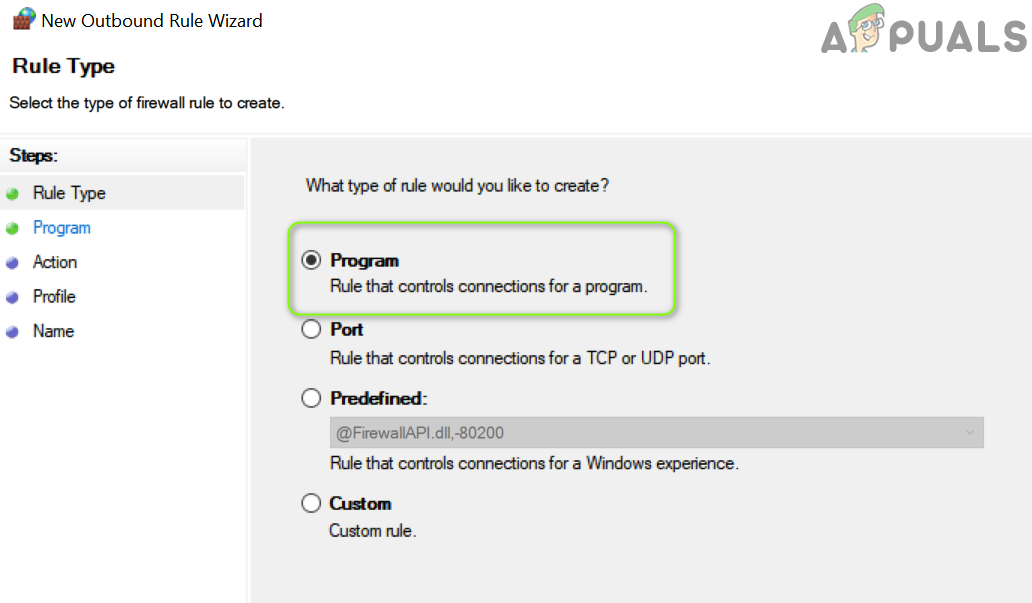
Select Program in New Dominion Window - And so click on Adjacent and click on Browse (in front end of This Program Path).

Open Scan and Steer to The Installation Directory of OBS - Now navigate to the installation directory of OBS and select its EXE file as per your Bone version (east.g., OBS64.exe in the /bin/64bit folder of the installation directory).
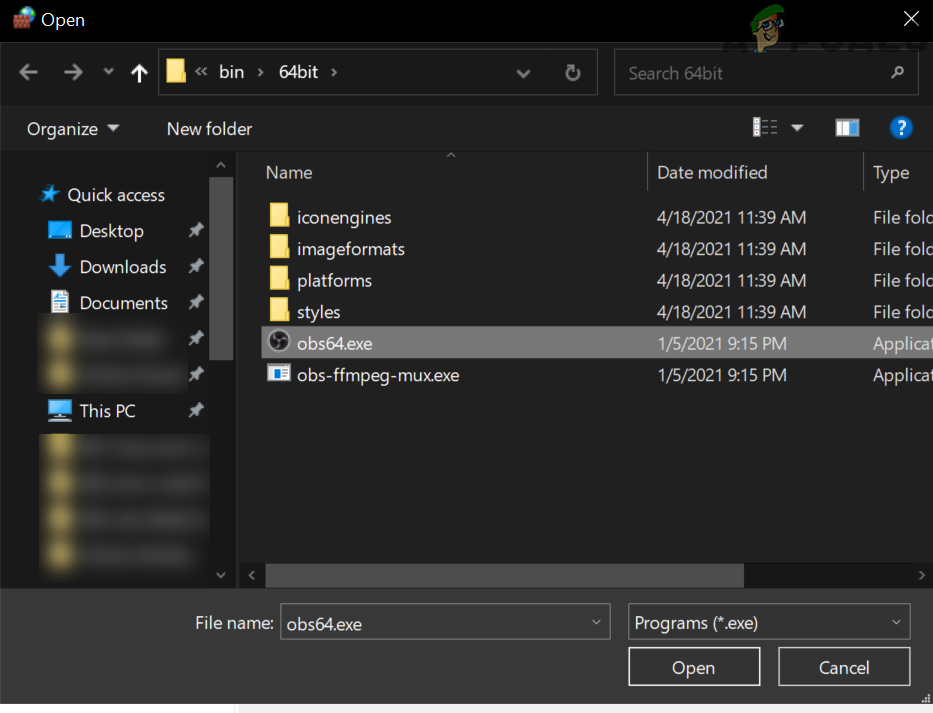
Select OBS64.exe in Firewall Rule - Once the path is added in the Firewall window, click on Next and select the radio button of Allow the Connexion.
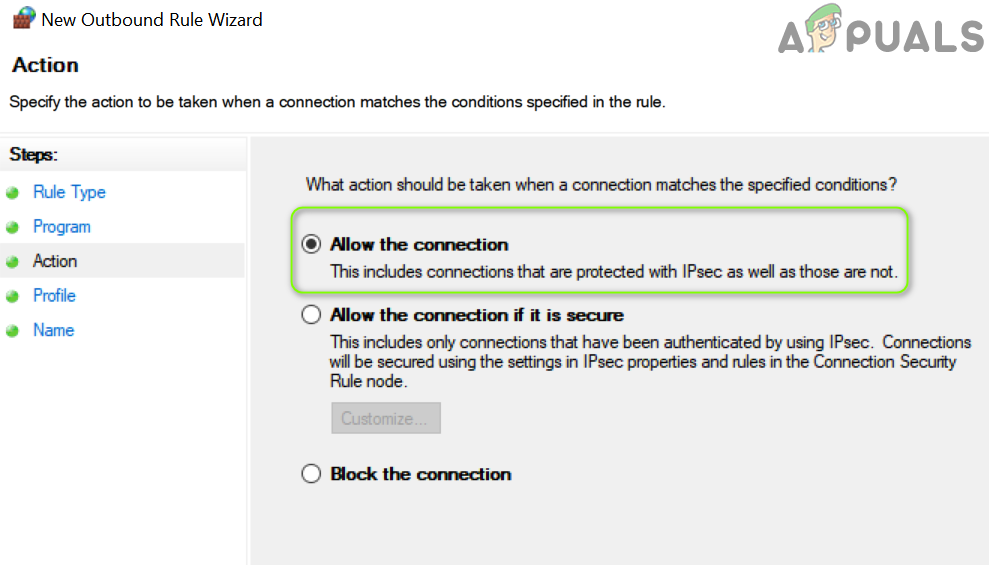
Select Allow The Connexion in New Dominion Window - Then select the Profile every bit per your requirements (for testing, it is improve to select all the 3 options i.e., Domain, Individual, and Public) and click Next.
- Now enter the proper name and description as per your requirements and click on Next.
- And so reboot your PC and check if the OBS can stream without whatsoever effect.
If the issue persists, then make sure that the router's firewall is not blocking OBS. Too, if you are using the OBS application in a VM, then check if the Firewall (of the system or Router) or the VM itself is not blocking the admission of the OBS. If and then, so open the TCP port 1935 (Outbound Rules>> Action>> New Rule>> Port>> TCP 1935) in the Firewall settings to check if that resolves the OBS issue. If the issue persists, so bank check if disabling the antivirus of your PC resolves the OBS connexion issue.
Solution 7: Lower the MTU (Maximum Transmission Unit) Size
The MTU (Maximum Transmission Unit) is used to fix the maximum size of the network parcel to be sent and a streaming server may driblet the packets (sent by the client) that are greater in the size from the configured MTU size of the server. In this scenario, lowering the MTU (Maximum Manual Unit) size may solve the problem. For analogy, we volition discuss the procedure for a Windows PC and you may follow the process as per your Bone.
- Correct-click Windows and select PowerShell (Admin).
- At present execute the following:
netsh int ipv4 show subinterface
- And so note downward the name of your network in the Interface column and execute the following:
netsh interface ipv4 set subinterface <subinterface name> mtu=1400 store=persistent
- Then once more execute the following to check if the MTU size of your network adapter has changed:
netsh int ipv4 show subinterface
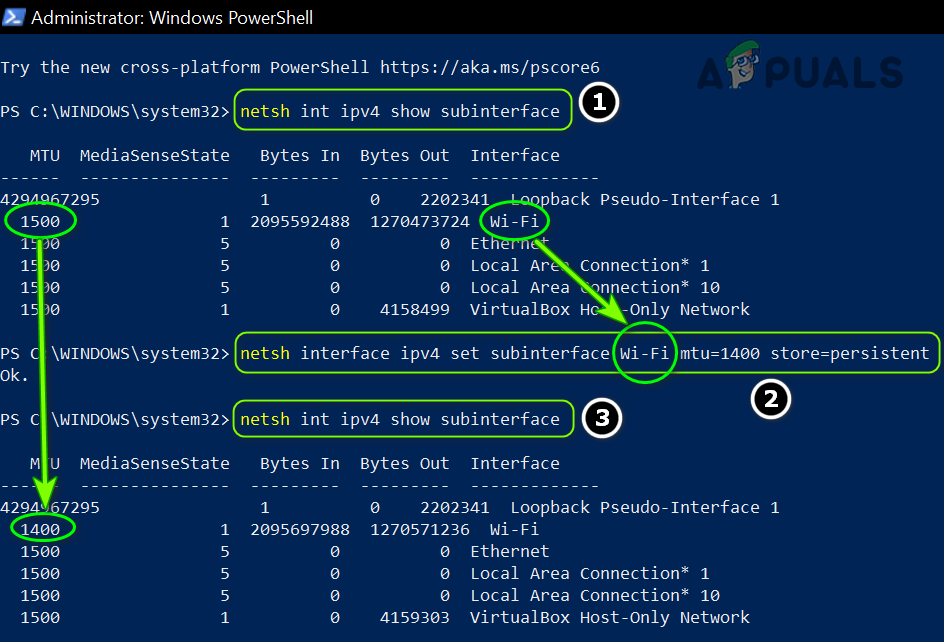
Alter the MTU of Your Network Adapter - Now reboot your PC and bank check if the OBS is clear of the failed to connect to server result.
Solution 8: Reset the Router to the Factory Defaults
Y'all may run into the issue at hand if your router settings are corrupt. In this instance, resetting the router to the factory defaults (brand sure to keep the credentials/instructions available) may solve the trouble. This process is normally non difficult just due to multifariousness in the router's brand and models, it is non feasible to cover all of them merely the general approach is ordinarily the same. You can reset the router either through a button on the router or use its spider web portal.
Reset Router Through a Button
- Switch on your router (if powered off) and locate the Reset push, either on the bottom or backside of the router.
- Now printing / concord (you may utilise a small and pointy item, e.g., a paperclip)the reset button for at to the lowest degree 30 seconds.

Reset Your Router - Then release the reset button and wait till the router is fully reset and powered on (it may take thirty to threescore seconds to complete). If there is no Reset push button on the router, bank check your device's manual to find out if the power button of the router tin can be used to reset it.
Reset Router Through the Spider web Portal
- Launch a web browser and steer to the default gateway of the router (e.grand., 192.168.1.1, the default gateway can be establish past the IPConfig command in the Command Prompt). Then enter the credentials to open up the router's web portal.
- At present, the complicated part, as the reset option may be located at different locations in unlike routers. Usually, it is in the System or General tab. Locate the Reset Settings (or Restore Defaults) option and and so click on it. Now confirm to reset the router and wait till the process is completed.
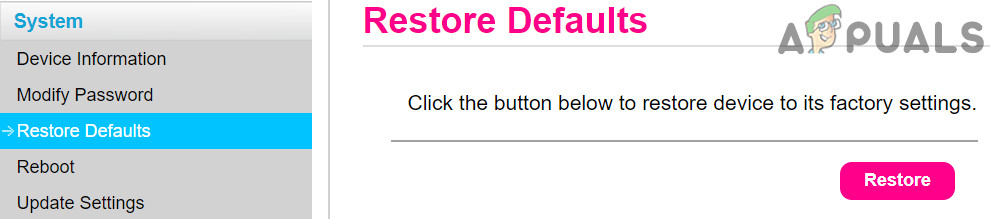
Restore Your Router to Default Settings'
Later resetting the router, make sure the necessary ports are forwarded (if required by the streaming server) and hopefully, OBS failed to connect event is resolved.
![]()
Source: https://appuals.com/solved-obs-failed-to-connect-to-server/
0 Response to "Obs Failed to Connect to Any Servers Please Check Your Internet Connection and Try Again"
Postar um comentário